距离 iOS 14 推出小组件已经有不少时间了, 现在网上也能找到很多相关的教程,不过就算如此,自己在开发的过程中还是遇到了不少坑,因此还是打算把自己的完整开发流程记录一下,以备不时之需。
小组件的分类与限制
目前可以开发的小组件安装尺寸大小可以分为大中小3种类型,其中中型和大型的可以添加事件交互,小型的不能添加交互,而且相比于 iOS 14 之前的小组件,在 iOS 14 中,苹果将交互限制推到了极致,控件只有点击事件,而且点击后能处理的事件也很单一, iOS 14 中小组件的作用更倾向于展示信息,必须在有应用的情况下开发,不能独立于应用单独存在。 在开发上苹果也对它有很多的限制,可能是为了手机性能着想吧。小组件开发只能使用 SwiftUI 框架, 不能使用 UIKit 框架开发, 而且小组件也不能主动发送事件信息和网络消息,它的数据来源依赖于时间线(TimeLine), 因为这些限制,导致小组的使用场景比较单一,更适合做一些显示相关的工作,但合理的使用小组件仍然能产生一些非常不错的效果,提升用户体验。
小组件文件结构解析
按照如图所示,在工程里面添加一个新的小组件
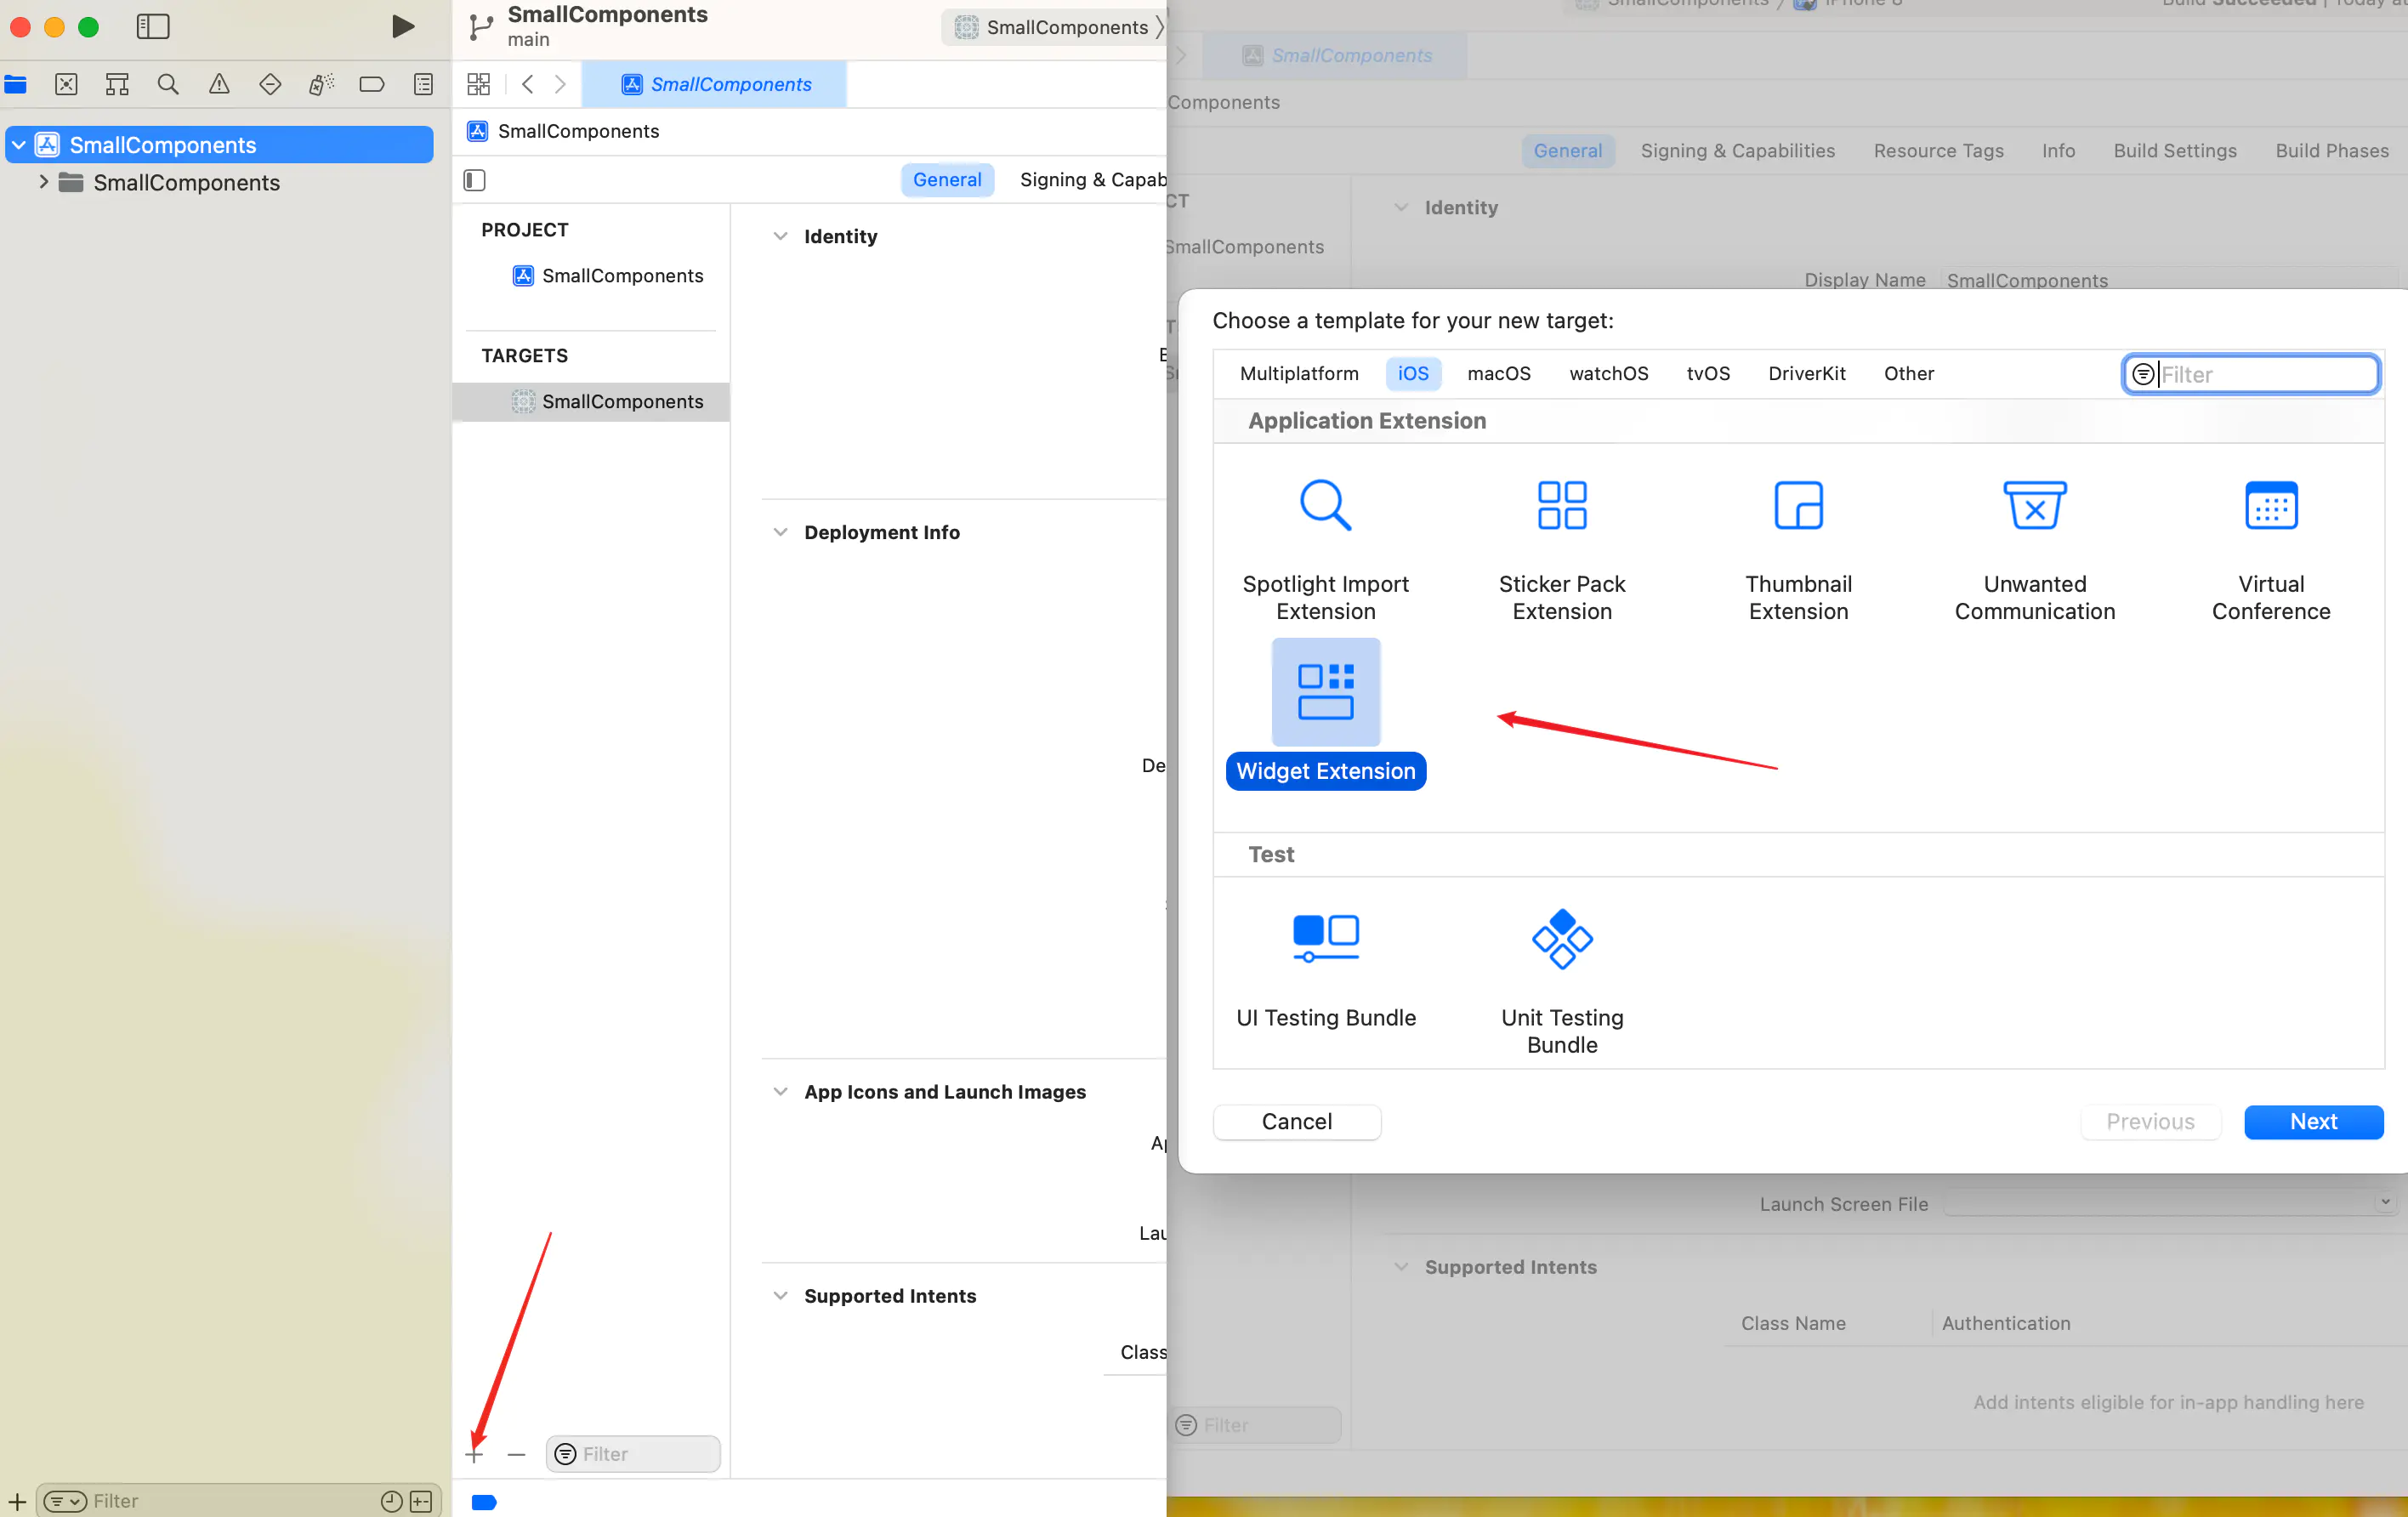
之后系统会自动为我们创建一个小组件的文件夹,里面包含相关代码,这里我创建了一个 Test 的小组件,打开 Test.swift 文件,我们能找到这样一段代码:
1
2
3
4
5
6
7
8
9
10
11
12
13
14
@main
struct Test: Widget {
    let kind: String = "Test"

    var body: some WidgetConfiguration {
        IntentConfiguration(kind: kind, intent: ConfigurationIntent.self, provider: Provider()) { entry in
            TestEntryView(entry: entry)
        }
        .configurationDisplayName("My Widget")
        .description("This is an example widget.")
        //系统模板没有该行
        .supportedFamilies([WidgetFamily.systemMedium])
    }
}
这个就是小组件的入口,小组件的样式都在做这里面构建,一些主要的参数解析如下:
kind: 小组件的唯一标识WidgetConfiguration: 小组件配置协议IntentConfiguration: 结构如下,主要针对需要用户配置的小组件,如果不需要配置,可以选择StaticConfiguration来实现。1 2 3 4 5 6 7 8 9 10 11 12
public struct IntentConfiguration<Intent, Content> : WidgetConfiguration where Intent : INIntent, Content : View { /// The content and behavior of this widget. public var body: some WidgetConfiguration { get } /// The type of widget configuration representing the body of /// this configuration. /// /// When you create a custom widget, Swift infers this type from your /// implementation of the required `body` property. public typealias Body = some WidgetConfiguration }
StaticConfiguration: 结构如下,如果不需要用户配置,可以使用配置1 2 3 4 5 6 7 8 9 10 11 12
public struct StaticConfiguration<Content> : WidgetConfiguration where Content : View { /// The content and behavior of this widget. public var body: some WidgetConfiguration { get } /// The type of widget configuration representing the body of /// this configuration. /// /// When you create a custom widget, Swift infers this type from your /// implementation of the required `body` property. public typealias Body = some WidgetConfiguration }
configurationDisplayName: 添加编辑界面展示的标题description: 显示的描述supportedFamilies: 设置Widget支持的控件大小,不设置则默认三个样式都实现
Provider 结构体
Provider 结构如下,其实就是一个结构体,遵循与IntentTimelineProvider 协议,如果不需要用户配置相关的东西,也可以遵循 TimelineProvider 协议,都需要实现以下3个方法, 具体作用见注释, 其中 SimpleEntry 是小组件要求的数据结构,它遵循 TimelineEntry 协议
1
2
3
4
5
6
7
public protocol TimelineEntry {
    /// The date for WidgetKit to render a widget.
    var date: Date { get }

    /// The relevance of a widget’s content to the user.
    var relevance: TimelineEntryRelevance? { get }
}
1
2
3
4
5
6
7
8
9
10
11
12
13
14
15
struct Provider: IntentTimelineProvider {
    func placeholder(in context: Context) -> SimpleEntry {
        //小组件的占位数据
        ...
    }

    func getSnapshot(for configuration: ConfigurationIntent, in context: Context, completion: @escaping (SimpleEntry) -> ()) {
        //编辑屏幕在左上角选择添加Widget、第一次展示时会调用该方法
        ...
    }

    func getTimeline(for configuration: ConfigurationIntent, in context: Context, completion: @escaping (Timeline<Entry>) -> ()) {
        ...
    }
}
在该结构体中,最重要的就是这个 getTimeline 函数, 他控制着小组件的刷新时机,在 completion 它要我们传入一个 Timeline<Entry> 的实例,这是系统提供的实例,结构如下:
1
2
3
4
5
6
7
8
public struct Timeline<EntryType> where EntryType : TimelineEntry {

    public let entries: [EntryType]

    public let policy: TimelineReloadPolicy

    public init(entries: [EntryType], policy: TimelineReloadPolicy)
}
-
entries: 实现了TimelineEntry协议的一个实例数组,这里也就是指SimpleEntry,当然也可以自定义其他结构,只要实现了TimelineEntry协议就可以 -
policy: 小组件刷新策略,具体结构如下:
1
2
3
4
5
6
7
8
9
10
11
12
13
14
public struct TimelineReloadPolicy : Equatable {
    //Timeline 中最后一个 Entry 显示完毕之后自动刷新。Timeline 方法会重新调用
    public static let atEnd: TimelineReloadPolicy

    //不刷新
    public static let never: TimelineReloadPolicy

    //到达某个特定时间后自动刷新
    public static func after(_ date: Date) -> TimelineReloadPolicy

   //Equatable 协议需要实现的比较函数
    public static func == (a: TimelineReloadPolicy, b: TimelineReloadPolicy) -> Bool
}
当然,这个刷新策略并不是绝对的,小组件的刷新时间都是由系统统一决定,是有一定延迟的,而且每个小组件每天接受的刷新数量也是有限制的,网友测试大概是在40次-70次左右,超过限制次数小组件就不会刷新了。顺带一提,小组件刷新的时候仍然是调用 getTimeline 方法, 所以一般都是在该方法内进行网络请求,数据组装之类的工作。
小组件除了通过时间线来刷新数据外,我们在应用内也可以调用以下方法来刷新小组件:
WidgetCenter.shared.reloadAllTimelines(): 该方法会刷新当前应用下的所有小组件。WidgetCenter.shared.reloadTimelines(ofKind: "Test"): 只刷新 Test 小组件,该名称是小组件唯一标识与小组件的kind值一致。 应用内刷新并不会占用小组件每天的刷新次数,所以如果小组件有频繁刷新需求的话建议引导用户到应用中实现。
小组件开发实战
下面我通过一个小小的 Demo 来结束这篇教程, Demo 小组件就是这样,很简单的一朵花,配上一段中英文名言,名言每隔半个小时会自己刷新一次。

Github 地址: https://github.com/Mephsito23/SmallComponents 代码很简单,就不一一赘述了,有兴趣的朋友可以下载 Demo 来自行查看。
除了以上内容外,还有一些开发中才会遇到的坑,需要注意一下,如果小组件需要和原生应用进行数据交互,只能使用 UserDefaults 将数据保存到沙盒里面后再在小组件中读取,并且要在Targe 里面将应用于小组件添加到同一个 AppGroups 中(这两个值要一致),如图所示:
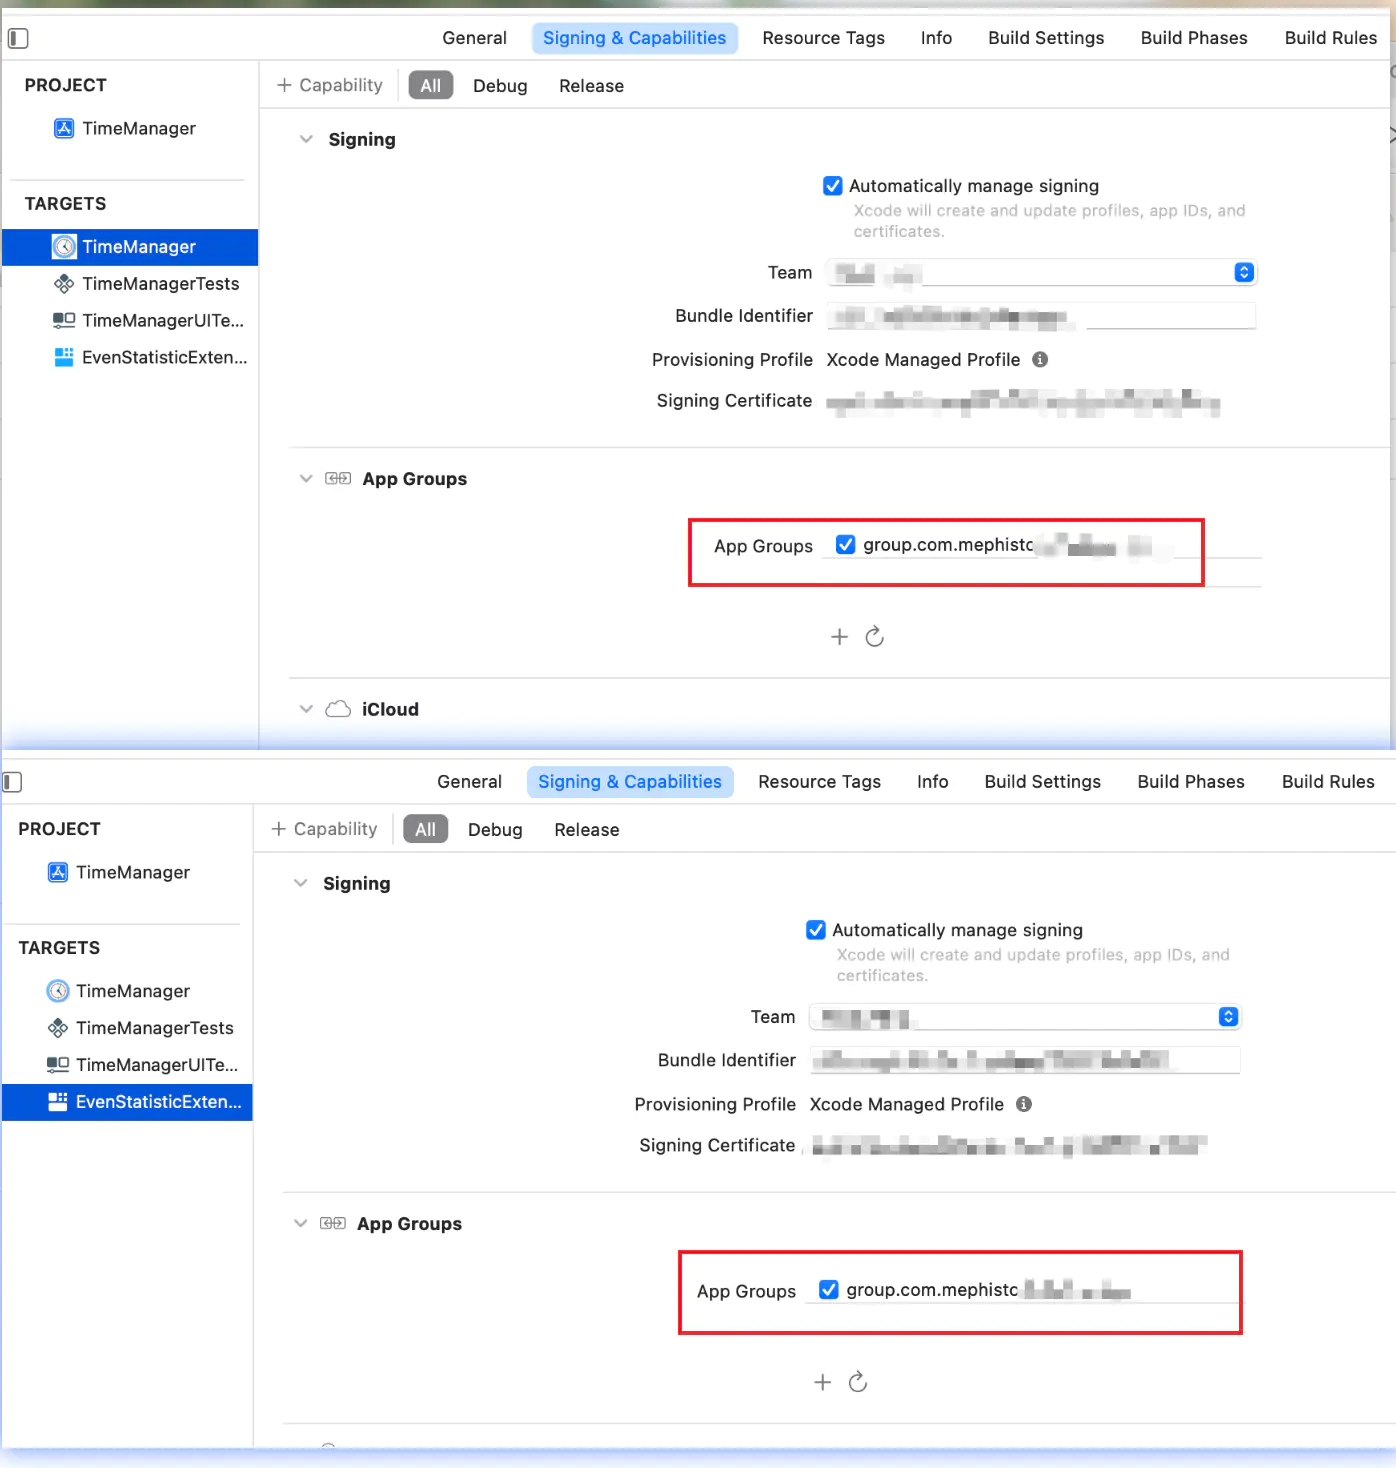
在应用和小组件中使用 UserDefaults(suiteName: AppGroups值),来进行数据的读取与写入。
自己还遇到的另一个坑是小组件不能共享应用内写入 Keychain 的数据,即使在 Keychain Groups 设置了相同的值也不行,不知道苹果后续对此会不会添加支持。