window安装RabbitMQ
- 首先安装Erlang: https://www.erlang.org/downloads
- 然后安装 RabbitMQ: https://www.rabbitmq.com/
- 启动 RabbitMQ
- 进入RabbitMQ 安装目录 sbin 目录下: C:\Program Files\RabbitMQ Server\rabbitmq_server-3.8.11\sbin
- 执行命令:
rabbitmq-plugins enable rabbitmq_management安装后台管理插件 - 安装完成后浏览器访问: http://localhost:15672 可以进入管理界面, 默认用户名密码均为: guest
Ubuntu 安装RabbitMQ
首先配置源
1
2
echo "deb https://dl.bintray.com/rabbitmq/debian trusty main" | sudo tee /etc/apt/sources.list.d/bintray.rabbitmq.list
echo "deb http://packages.erlang-solutions.com/ubuntu trusty contrib" | sudo tee -a /etc/apt/sources.list.d/erlang_solutions.list
导入对应的 key
1
2
wget -c -O- http://packages.erlang-solutions.com/ubuntu/erlang_solutions.asc | sudo apt-key add -
wget -O- https://dl.bintray.com/rabbitmq/Keys/rabbitmq-release-signing-key.asc |sudo apt-key add -
开始安装 erlang 和 RabbitMQ
1
2
3
sudo apt-get update
sudo apt-get install erlang-nox
sudo apt-get install rabbitmq-server
RabbitMQ 操作命令
1
2
3
4
sudo service rabbitmq-server start # 启动
sudo service rabbitmq-server stop # 停止
sudo service rabbitmq-server restart # 重启
sudo service rabbitmq-server status # 查看当前状态
RabbitMQ nginx 外网部署
1
2
3
4
5
6
7
8
9
10
11
12
13
14
15
16
17
  location ~* /rabbit/api/(.*?)/(.*) {
     proxy_pass http://localhost:15672/api/$1/%2F/$2?$query_string;
  }

  location ~*/rabbit/(.*) {
     client_body_buffer_size 128k;
     proxy_send_timeout   90;
     proxy_read_timeout   90;
     proxy_buffer_size    4k;
     proxy_buffers     16 32k;
     proxy_busy_buffers_size 64k;
     proxy_temp_file_write_size 64k;
     proxy_connect_timeout 30s;
     rewrite ^/rabbit/(.*)$ /$1 break;
     proxy_pass http://localhost:15672;
  }
开始使用
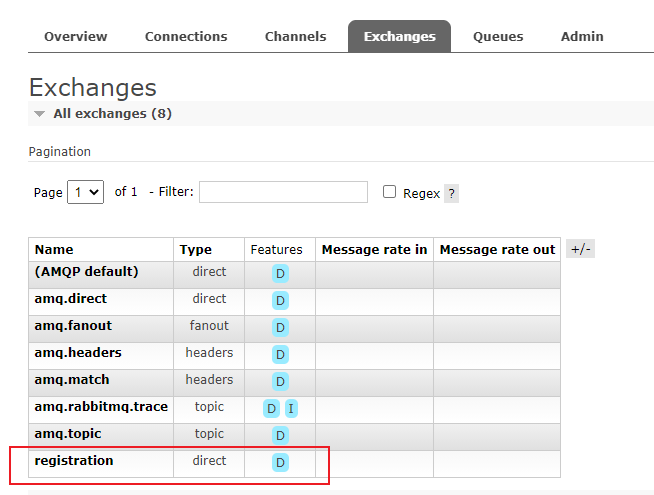
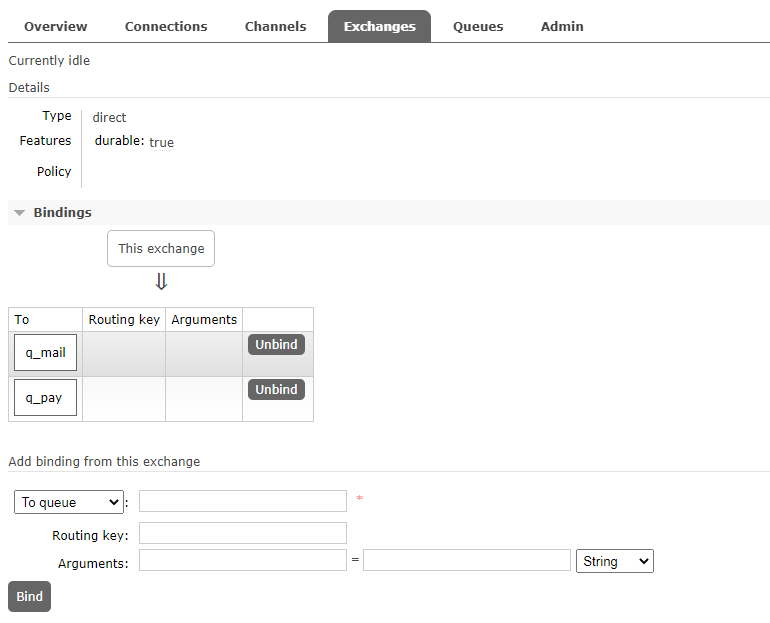
- 创建两个队列
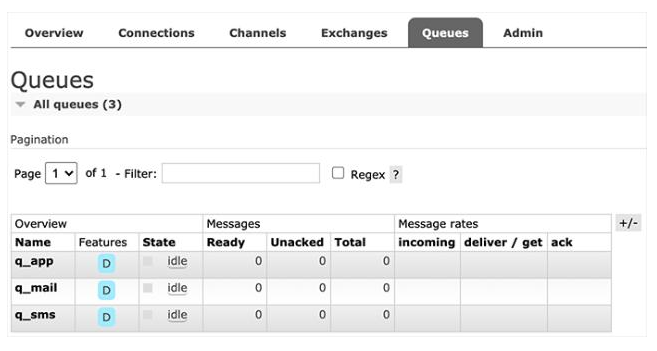
- 创建一个 Exchanges,并且添加两个绑定
 到此,RabbitMQ 设置完成,接下来开始SpringBoot 的编程。
SpringBoot 配置
在SpringBoot 工程里面添加 amqp 依赖,我们选择SpringBoot 自带的就可以
1
2
  //添加RabbitMQ
    implementation "org.springframework.boot:spring-boot-starter-amqp"
然后新建一个队列监听组件:
1
2
3
4
5
6
7
8
9
10
11
12
13
14
15
16
17
18
19
20
21
22
23
24
25
import lombok.extern.slf4j.Slf4j;
import org.springframework.amqp.rabbit.annotation.RabbitListener;
import org.springframework.beans.factory.annotation.Autowired;
import org.springframework.stereotype.Component;

import java.util.Date;

@Slf4j
@Component
public class QueueMessageListener {

  static final String QUEUE_MAIL = "q_mail";
  static final String QUEUE_PAY = "q_pay";

  @RabbitListener(queues = QUEUE_MAIL)
  public void onRegistrationForMailQueue(RabbitMail data) throws Exception {
    //收到 q_mail 消息,实现业务逻辑
  }

  @RabbitListener(queues = QUEUE_PAY)
  public void onRegistrationForPayQueue(RabbitPay data) throws Exception {
    //收到 q_pay 消息,实现业务逻辑
  }
}
在需要使用的时候使用 RabbitTemplate 发送对应的消息即可
1
2
3
4
5
6
7
8
9
10
11
12
13
14
15
16
17
18
19
20
21
import org.springframework.amqp.rabbit.core.RabbitTemplate;
import org.springframework.beans.factory.annotation.Autowired;
import org.springframework.stereotype.Component;

import java.util.List;
import java.util.stream.Collectors;

@Component
public class MessagingService {
  @Autowired RabbitTemplate rabbitTemplate;


  public void sendEmail() {
      //此处的registration 要和 RabbitMQ中创建的Exchanges 对应
      rabbitTemplate.convertAndSend("registration", "", "example@mail.com");
  }

  public void sendValidatePay() {
    rabbitTemplate.convertAndSend("registration", "", "data");
  }
}
至此,就可以使用 RabbitMQ 啦。